Images are an essential part of social media content. Whether you manage a business page, run a personal brand, create content for clients, or promote products online, the images you publish can influence how people interact with your posts.
However, every social media platform has different image dimensions and display requirements. An image that looks perfect on Instagram may appear cropped on Facebook. A Pinterest graphic may not fit properly in an Instagram post, while a YouTube thumbnail may lose important details if it is not prepared in the correct dimensions.
This is why using a social media image resizer can make your content creation process much easier.
A social media image resizer helps you adjust image dimensions for different platforms without having to redesign every image from the beginning. You can prepare graphics for Instagram, Facebook, TikTok, Pinterest, YouTube, LinkedIn, and other social networks.
In this guide, you will learn what a social media image resizer is, how to resize images for different platforms, which image dimensions to use, how to maintain image quality, and how to optimize images before publishing.
What Is a Social Media Image Resizer?
A social media image resizer is an online tool or software application that changes the dimensions of images to match the requirements of different social media platforms.
For example, you might create one promotional graphic for your business and want to publish it on Instagram, Facebook, Pinterest, and LinkedIn.
Instead of manually adjusting the image in separate editing applications, you can use an image resizer to prepare different versions.
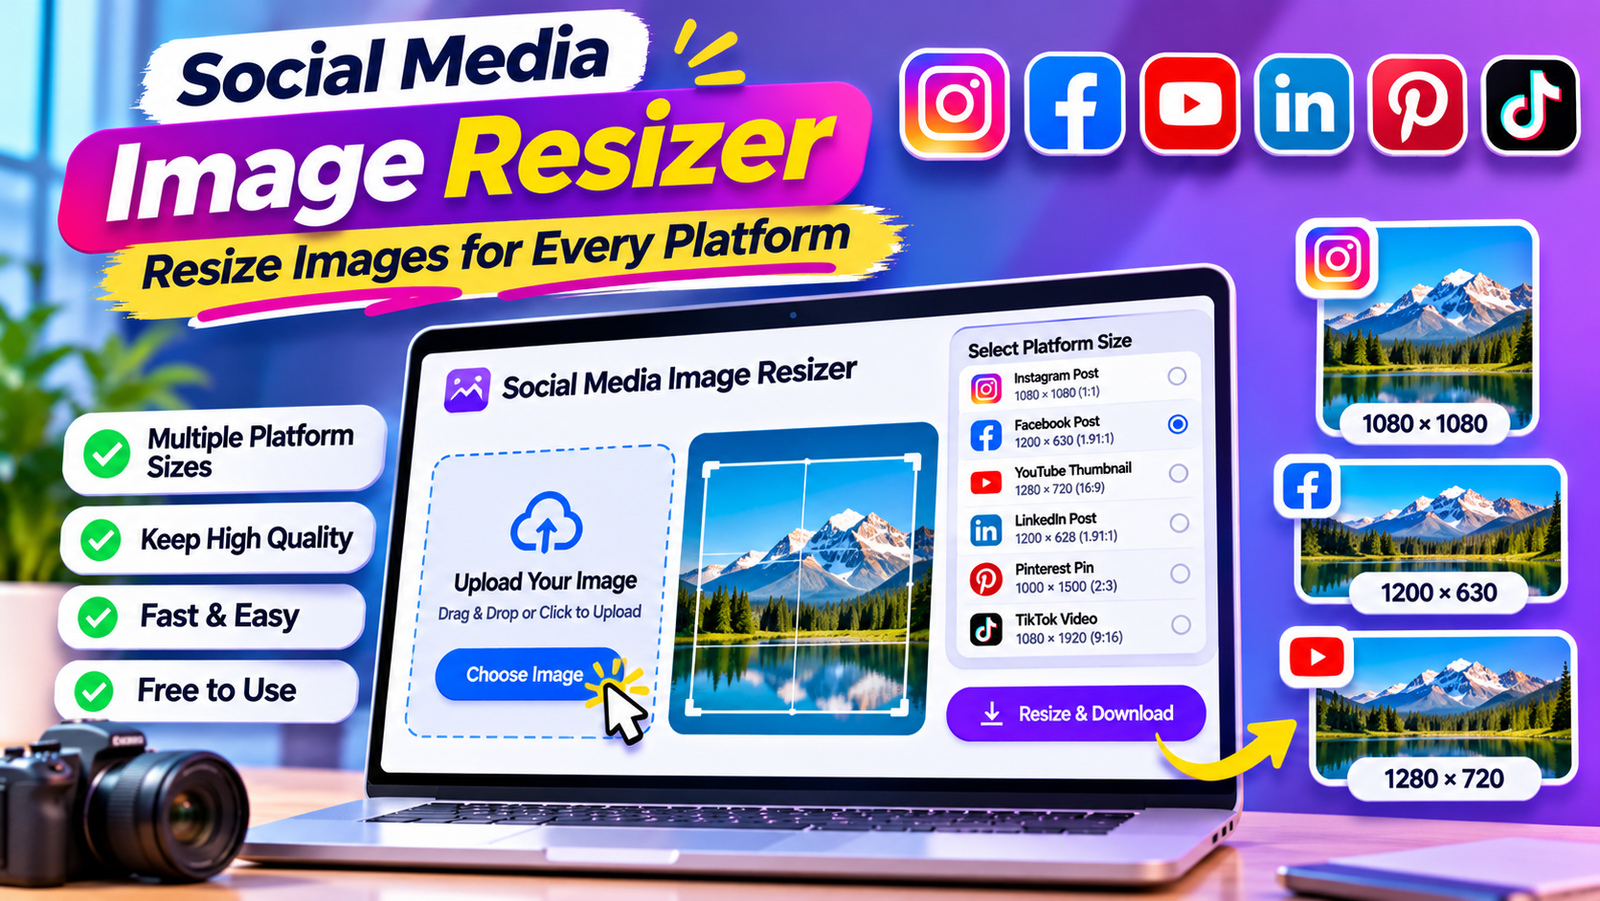
A typical social media image resizer may allow you to:
Upload an image from your device.
Select a social media platform.
Choose a predefined image size.
Enter custom width and height values.
Crop or fit an image into a selected aspect ratio.
Preview the resized image.
Download the result.
Prepare images for multiple social media platforms.
The main purpose is to save time and make sure your images fit their intended placement.
Free Social Media Image Resizer for Every Platform
If you regularly publish content on multiple social networks, resizing images manually can become repetitive.
A social media image resizer makes this process easier by providing preset dimensions for popular platforms.
A useful online tool should let you select a platform, choose an image format, adjust the image, and download the finished result.
How to Use a Social Media Image Resizer
Follow these simple steps:
Step 1: Upload Your Image
Choose an image from your computer, laptop, tablet, or mobile device.
Step 2: Select a Social Media Platform
Choose where you want to publish your image, such as:
TikTok
YouTube
X
Step 3: Select the Image Format
Choose a suitable format or placement, such as a square post, portrait post, story, cover image, or thumbnail.
Step 4: Adjust the Image
If cropping is required, position the image so that important objects, text, and logos remain visible.
Step 5: Preview the Result
Check the image before downloading it. Make sure the design looks balanced and important information is not cut off.
Step 6: Download Your Resized Image
Save the final image to your device and upload it to your selected social media platform.
Note: This article describes the intended functionality of a social media image resizer. A working upload, resize, preview, and download tool must be implemented separately on the website.
Why Do Social Media Image Sizes Matter?
Using appropriate image dimensions helps your content display correctly across different devices and placements.
Here are some reasons why image sizes matter.
1. Prevent Unwanted Cropping
Social media platforms display images in different aspect ratios.
If you upload an image with unsuitable dimensions, parts of the design may be cropped or displayed differently than expected.
For example, a wide image may not fit a vertical story placement.
Resizing and previewing your image before publishing can help reduce these problems.
2. Maintain Professional Design
Images that fit their intended placements generally look more polished.
This is particularly important for businesses, brands, agencies, and creators who publish regularly.
3. Improve the Mobile Viewing Experience
A large percentage of social media browsing takes place on mobile devices.
An image designed for the correct placement can be easier to view on smaller screens.
4. Save Time
Without an image resizer, you may need to open a separate editing application and adjust the dimensions manually.
A tool with ready-made presets can simplify repetitive tasks.
5. Maintain Brand Consistency
Businesses often use the same colors, logos, and design elements across several platforms.
Preparing correctly sized versions of the same graphic helps maintain a consistent visual identity.
6. Prepare Content for Multiple Platforms
If you manage several social accounts, one image may need multiple versions.
An image resizer helps you prepare those versions more efficiently.
Social Media Image Sizes for Every Major Platform
Different social media platforms support different image placements.
The following table provides commonly used image dimensions as practical starting points. Platform specifications can change, and some placements support multiple sizes.
Always check the current platform guidance for important campaigns.
| Platform and placement | Recommended starting size | Aspect ratio |
| Instagram square post | 1080 × 1080 px | 1:1 |
| Instagram portrait post | 1080 × 1350 px | 4:5 |
| Instagram Story | 1080 × 1920 px | 9:16 |
| Instagram Reel cover | 1080 × 1920 px | 9:16 |
| Facebook feed image | 1200 × 630 px | 1.91:1 |
| Facebook square post | 1080 × 1080 px | 1:1 |
| Facebook Story | 1080 × 1920 px | 9:16 |
| Facebook cover photo | 851 × 315 px | Approx. 2.7:1 |
| TikTok video cover | 1080 × 1920 px | 9:16 |
| Pinterest standard Pin | 1000 × 1500 px | 2:3 |
| YouTube thumbnail | 1280 × 720 px | 16:9 |
| LinkedIn landscape image | 1200 × 627 px | Approx. 1.91:1 |
| X landscape image | 1600 × 900 px | 16:9 |
These dimensions are useful starting points, not a guarantee that every placement will display identically on every device.
Instagram Image Sizes
Instagram supports several image placements, including feed posts, Stories, and Reels.
Instagram square post: 1080 × 1080 pixels
Square images are useful for product photography, announcements, promotional graphics, and general feed content.
Instagram portrait post: 1080 × 1350 pixels
Portrait images use more vertical space in the feed and are a popular choice for educational graphics and lifestyle photography.
Instagram Story: 1080 × 1920 pixels
Stories are designed for vertical viewing. Leave enough space around important text and design elements because interface controls can cover parts of the screen.
Instagram Reels cover: 1080 × 1920 pixels
Reel covers use a vertical canvas, but the visible crop may differ across profile grids and other placements. Keep important content near the center.
Facebook Image Sizes
Facebook supports images for feed posts, Stories, covers, advertisements, and other placements.
Facebook feed image: 1200 × 630 pixels
This landscape format is a useful starting point for link previews and wide promotional graphics.
Facebook square post: 1080 × 1080 pixels
Square images are suitable for product promotions, announcements, and general feed graphics.
Facebook Story: 1080 × 1920 pixels
Use a vertical design for full-screen Story content.
Facebook cover photo: 851 × 315 pixels
A cover image should be designed with the possibility of different desktop and mobile crops in mind. Keep essential text and logos away from the edges.
TikTok Image Sizes
TikTok is primarily focused on vertical video content.
TikTok vertical content: 1080 × 1920 pixels
A 9:16 canvas is a common starting point for TikTok videos and cover designs.
Keep important text, logos, and visual elements away from areas covered by the interface.
Pinterest Image Sizes
Pinterest is a visual discovery platform where vertical graphics are commonly used.
Standard Pinterest Pin: 1000 × 1500 pixels
The 2:3 aspect ratio is a popular format for standard Pins.
It works well for:
Home decor graphics
Fashion inspiration
Recipe Pins
Educational infographics
DIY tutorials
Product promotions
Travel inspiration
For example, a home decor creator can use a vertical Pin featuring a clear title, an attractive room image, and a short description.
YouTube Image Sizes
YouTube uses different image dimensions for thumbnails, channel banners, and profile pictures.
YouTube thumbnail: 1280 × 720 pixels
The 16:9 aspect ratio is the standard starting point for video thumbnails.
A good thumbnail should:
Clearly communicate the video topic.
Use readable text.
Have a strong focal image.
Avoid unnecessary visual clutter.
Remain understandable on smaller screens.
LinkedIn Image Sizes
LinkedIn is commonly used for professional networking, company updates, educational content, and business marketing.
LinkedIn landscape image: 1200 × 627 pixels
This is a useful starting size for many landscape feed graphics.
Square and portrait formats may also be suitable for certain content placements.
For professional graphics, use clear typography, consistent branding, and simple layouts.
X Image Sizes
X supports different image formats depending on the placement.
Landscape image: 1600 × 900 pixels
This 16:9 format can be used as a starting point for landscape graphics.
Check the preview before publishing because image display and cropping can vary by placement and device.
Best Image Formats for Social Media
Choosing the right file format is another important part of preparing images.
Different formats offer different benefits.
JPEG or JPG
JPEG is commonly used for photographs and images containing many colors.
Advantages:
Usually smaller file sizes than uncompressed images.
Widely supported.
Suitable for photographs.
Useful for many social media graphics.
One disadvantage is that JPEG uses lossy compression, so repeatedly saving an image at low quality can reduce its visual quality.
PNG
PNG is useful for graphics that need sharp edges or transparency.
Advantages:
Supports transparent backgrounds.
Preserves sharp text and graphic elements well.
Suitable for logos, icons, and illustrations.
PNG files can be larger than JPEG files, particularly for detailed photographs.
WebP
WebP is a modern image format that can provide good visual quality at relatively small file sizes.
Advantages:
Supports lossy and lossless compression.
Supports transparency.
Can reduce file size compared with some traditional formats.
However, check whether your intended platform and workflow support the format you want to upload.
Which Format Should You Choose?
For many photographs, JPEG is a practical option.
For logos, transparent graphics, and designs containing sharp text, PNG may be more suitable.
WebP can be useful for web publishing when supported by the platform.
Choose a format based on the image, intended placement, and upload requirements.
How to Resize Images Without Losing Quality
One common concern when resizing images is quality loss.
An image may become blurry, pixelated, or distorted if it is resized incorrectly.
Here are practical tips to help maintain quality.
1. Start With a High-Resolution Image
Whenever possible, use an original image with sufficient resolution.
Enlarging a small image does not create genuine missing detail. It can make the result look blurry or pixelated.
2. Maintain the Correct Aspect Ratio
An image’s aspect ratio describes the relationship between its width and height.
For example:
1:1 means square.
4:5 means portrait.
16:9 means landscape or widescreen.
9:16 means vertical.
If you change the width and height without considering the original proportions, the image may become stretched.
Use proportional resizing or cropping instead.
3. Avoid Excessive Compression
Compression reduces file size, but too much compression can create visible artifacts.
For photographs, use a sensible quality setting and inspect the exported result.
For graphics containing small text, check carefully for blurred edges.
4. Use the Correct Export Dimensions
If a platform requires a specific image placement, export the image at a suitable size instead of repeatedly resizing the same file.
5. Preview Before Downloading
Always check the final image.
Look for:
Cropped text
Cut-off logos
Distorted objects
Blurry details
Unwanted borders
Poor alignment
6. Keep an Original Copy
Save your original image before making edits.
This gives you a clean source for creating different versions later.
Image Resizing vs. Image Cropping: What Is the Difference?
Image resizing and cropping are related, but they do different things.
Image Resizing
Resizing changes an image’s dimensions.
For example, you might reduce an image from 2000 × 2000 pixels to 1080 × 1080 pixels.
The entire image can remain visible if the aspect ratio is preserved.
Image Cropping
Cropping removes part of an image to fit a selected shape or composition.
For example, you might crop a landscape photograph into a portrait layout for an Instagram post.
Cropping can remove unwanted background areas, but it can also remove important objects if the composition is not checked.
Which One Should You Use?
Use resizing when you want to change the dimensions while keeping the entire composition.
Use cropping when you need to fit an image into a specific aspect ratio or remove unnecessary areas.
Sometimes both methods are needed to prepare a graphic correctly.
How Businesses Can Benefit From a Social Media Image Resizer
Businesses often publish content across multiple social media platforms.
They may create product announcements, promotional graphics, customer testimonials, advertisements, and educational posts.
Preparing a different image for every placement can take considerable time.
A social media image resizer can simplify this process.
1. Product Marketing
Online stores can resize product photographs for different social platforms.
A square product image may work well for one placement, while a vertical design may be more appropriate for a Story or Pin.
2. Promotional Campaigns
Businesses can prepare consistent promotional designs in multiple dimensions.
For example, a sale announcement can be adapted for Facebook, Instagram, Pinterest, and LinkedIn.
3. Brand Awareness
A consistent visual identity helps people recognize a business.
Resizing tools can help preserve logos, colors, and other brand elements across different placements.
4. Content Marketing
Businesses that publish educational graphics, tutorials, and infographics can adapt the same content to multiple platforms.
5. Agency Workflows
Social media managers and digital marketing agencies often work with several clients.
A convenient image resizing workflow can reduce repetitive editing and help teams prepare content more efficiently.
Common Social Media Image Resizing Mistakes
Even with a resizing tool, some mistakes can affect the final result.
1. Stretching Images
Changing width and height independently can distort people, products, and other objects.
Maintain the aspect ratio unless you intentionally want a different composition.
2. Ignoring Safe Areas
Text near the edges may be hidden by platform interface elements or cropped in certain placements.
Keep important information within a safe central area.
3. Using Low-Resolution Images
A small source image may not look sharp when enlarged.
Start with a sufficiently large original whenever possible.
4. Using the Same Dimensions Everywhere
Different platforms and placements have different image requirements.
Do not assume that one size will work perfectly everywhere.
5. Forgetting Mobile Previews
An image may look good on a desktop screen but difficult to read on a phone.
Check the design at smaller sizes before publishing.
6. Adding Too Much Text
Overcrowded graphics can become difficult to understand.
Use a clear heading, readable text, and a simple visual hierarchy.
7. Not Checking the Final Export
Always inspect the downloaded file before uploading it.
Make sure the correct dimensions, format, and quality have been preserved.
Tips for Creating Better Social Media Images
Correct dimensions are only one part of good social media design.
Here are some additional ways to improve your graphics.
Use Clear and Readable Typography
Choose fonts that remain readable on mobile devices.
Avoid using too many different font styles in one design.
Follow a Consistent Brand Style
Use a recognizable combination of colors, fonts, and visual elements.
Consistency can help make your posts look like they belong to the same brand.
Keep the Main Subject Visible
Position important objects, faces, and text carefully.
Avoid placing essential information near areas that may be cropped.
Use High-Quality Images
Clear and relevant visuals make your content easier to understand.
Use original images or properly licensed visual assets.
Design for the Platform
An Instagram Story, Pinterest Pin, and YouTube thumbnail serve different purposes.
Adapt the composition to the platform rather than simply changing the canvas dimensions.
Optimize Images for Web Performance
If you publish images on your website, consider:
Appropriate file formats.
Sensible compression.
Descriptive file names.
Useful alternative text.
Responsive image sizes.
Lazy loading for suitable below-the-fold images.
These practices can help improve the experience for website visitors.
Frequently Asked Questions About Social Media Image Resizers
1. What is a social media image resizer?
A social media image resizer is a tool that changes image dimensions to fit different social media platforms and placements, such as Instagram posts, Facebook images, Pinterest Pins, and YouTube thumbnails.
2. Can I resize images for all social media platforms?
A tool with flexible presets or custom dimensions can help you prepare images for many platforms, including Instagram, Facebook, TikTok, Pinterest, YouTube, LinkedIn, and X.
Always verify the requirements of the specific placement before publishing.
3. What is the best image size for Instagram?
Common starting sizes include 1080 × 1080 pixels for square posts, 1080 × 1350 pixels for portrait posts, and 1080 × 1920 pixels for Stories.
4. What is the best image size for Pinterest?
A standard Pinterest Pin commonly uses a 1000 × 1500 pixel canvas with a 2:3 aspect ratio.
5. What size should a YouTube thumbnail be?
A YouTube thumbnail commonly uses 1280 × 720 pixels with a 16:9 aspect ratio.
6. Does resizing an image reduce its quality?
Resizing does not always create noticeable quality loss. However, enlarging small images, using excessive compression, or repeatedly exporting images at low quality can reduce visual quality.
7. What is the difference between resizing and cropping?
Resizing changes the dimensions of an image. Cropping removes part of the image to fit a particular composition or aspect ratio.
8. Which image format is best for social media?
JPEG is useful for photographs, PNG is suitable for graphics and transparency, and WebP can be useful in supported workflows. The best format depends on the image and platform requirements.
9. Can I resize images on my phone?
Yes. You can use supported online image resizing tools or mobile editing applications to adjust images on smartphones and tablets.
10. Can I resize one image for multiple social media platforms?
Yes. You can create multiple versions of the same original image using different dimensions and aspect ratios.
Review each version to make sure important content remains visible.
11. Why do my social media images look blurry?
Images may look blurry because the original file has low resolution, the image has been enlarged too much, or excessive compression has been applied.
Start with a high-quality original and check the exported file.
12. Is an online social media image resizer free?
Some online image resizers provide free resizing features. Other services may offer additional tools through paid plans.
Check the tool’s pricing and limitations before using it.
13. Can I resize images without installing software?
Yes. Browser-based image resizers can allow users to upload, adjust, and download images without installing a desktop editing application.
14. What is the best aspect ratio for social media?
There is no single best aspect ratio for every placement. Square, portrait, landscape, and vertical formats are used for different types of content.
Choose the ratio that matches your intended placement.
15. Do social media platforms automatically resize uploaded images?
Some platforms process uploaded images and may resize, compress, or crop them. Preparing an image at a suitable size can help you control its appearance more effectively.
Conclusion
Creating social media graphics is easier when you understand the image dimensions required by each platform.
An image that looks excellent in one placement may not fit another. Incorrect dimensions can lead to unwanted cropping, distorted designs, and difficult-to-read text.
A social media image resizer helps simplify this process by allowing you to prepare images for Instagram, Facebook, TikTok, Pinterest, YouTube, LinkedIn, and other platforms.
Start with a high-quality original, choose the correct dimensions, maintain the aspect ratio, and preview the final result before publishing.
Whether you are a content creator, business owner, marketer, or social media manager, a reliable image resizing workflow can save time and help you maintain consistent visual content across platforms.
Use the right dimensions for every placement and make your social media graphics ready to publish.